Disable a user account, or delete an account
Summary
Access
Permissions
Managers can disable and delete individual users within their groups, through the learner's user profile. Managers don't have access to batch user upload, so can't disable large numbers of accounts in one step.
Overview of
login status: enabled, disabled, and expired
Disable an account
To temporarily prevent user access to Safety Made Simple, you can disable a user's login from the user's profile page.
- From main navigation menu select Users.
- Search for and select the user you need to disable.
- From Basic Info, toggle Login enabled, to disable access.
- Save to finish.
The following screenshot of a user's Info, with their access disabled.

If the user attempts to log in, the login page shows a message that reads: Your account is disabled or has expired.
 Tip: To disable a large number of user accounts, use the batch upload process.
Enabling an account again
To enable a user account again, repeat the process for disabling the account, setting the account to Login enabled.
To re-enable a large number of accounts, use the batch upload process, settings the entries in the enabled column to Yes.
For users in groups: when the account is enabled again, Safety Made Simple enrolls the users in any courses assigned to their group which they missed. The user receives the course notification messages.
 Note: this enrollment step to "catch up" on group courses happens even if a course has expired. The user needs to follow up with their organization, outside of Safety Made Simple, to determine next steps.
 Delete an account from a portal
 Warning: Safety
Made Simple does not recommend deleting users because you will lose
their training history. It is always best to disable a user. You can use the
filters to weed out the disabled users when running reports or performing
searches.
Warning: Safety
Made Simple does not recommend deleting users because you will lose
their training history. It is always best to disable a user. You can use the
filters to weed out the disabled users when running reports or performing
searches.- From the main navigation go to Users > find desired user name.
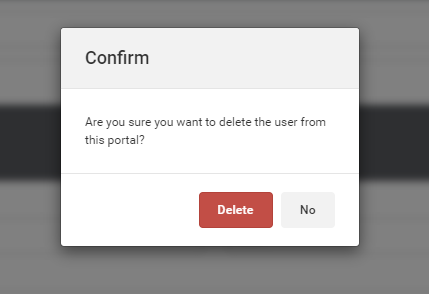
- From the action menu select Delete User. The application opens a dialog, which reads:
- Confirm: Are you sure you want to delete the user from this portal?
The following screenshot shows the dialog.

- From the confirmation dialog that opens, select Delete.
Related Articles
Admins: Batch user upload: overview and options explained
Intended Audience: Administrators Summary Create, invite or update data for large numbers of users by uploading a CSV file: this article covers the feature, and its options in detail. The batch user upload feature is an effective tool for admins to ...Admins: User types and permissions: overview
Intended Audience: Administrators Learn the four broad user types and their permissions within Safety Made Simple. User types define what features users can access. You set the user type when you create or invite users. The 4 user types are: ...Admins: Custom user data and dynamic rules: editing options
Intended Audience: Administrators Summary Learn what parts of custom user data you can change while dynamic rules are active. As background for editing custom user data, see: Custom user data: set up custom fields with details about field types ...Download all user data in portal
Intended Audience: Admins, Managers Summary Download all your user settings and information, aka metadata, including custom user data, in comma-separated value (CSV) format. This download contains most of the data available from a user's profile. Use ...Admins: Dynamic rules: use custom user data or email domain to assign users to groups
Intended Audience: Administrators Summary Use email domains, account creation date and custom user data to filter your users into groups, as soon as you create them. Dynamic rules can both add and remove users based on changes in their data. Creating ...